I think this will cheer me up though! I will post the fabric and shirt choice and the finished product this week!
http://asmallsnippet.blogspot.com/2011/09/wanna-make-dress.html
Monday, April 2, 2012
Wednesday, March 28, 2012


Wednesday, March 21, 2012
I could kill myself for starting this project when I am the worlds worst at measuring.
I found this amazing fabric that I posted about in my last posting. Except it was almost 30 dollars a yard. If I had made my curtains fully out of that with lining they would have been like $225 dollars. I wasn't sure I trusted myself with that much money attached to my sewing machine so I opted to take another route. My sister bought some panels from Pier One a couple of years ago for her office and when she got them home they weren't nearly long enough. Her mother in law is a sewer and came up with this for her:
 So I copied.
I did not take pictures step by step of me making these and believe me, you could thank me because I'm sure I didn't do them the right way.
Here are some pictures of the transformation.

 Here is the first curtain unhemmed and without trim. Basically I took 3 yards of burlap went around the outline of the burlap and ironed down an inch hem, then went back around and ironed that 1 inch hem folded over.
After that was completed. I took a piece of liner that was the same size and tucked the liner under the burlap hems and pinned. Then I sewed around the perimeter of the burlap piece.
Once that was completed I laid the burlap piece right side up and pinned the patterned fabric to the burlap so that its finished size would be 20" long. I sewed around the edge of the patterned fabric.
To create the pleats at the top of the curtain I literally just folded 3 pieces of the fabric to make a fan-like area on the curtain and pinned. I then sewed an "L" shape into the fabric. (If anyone has specific questions as to what this looks like up close I'll be glad to take pictures.)
Then I hemmed and added the trim like so:
 Here's where the problem started. I have to make another curtain JUST like the first one. HAHA.
After measuring and measuring and pinning it still turned out to be wrong. To the naked eye I rigged it to be so-so, but when you pull out your yard stick you can blatantly see that the first curtain's patterned fabric area is longer than the second's.
 So If you look you will notice that at first the curtain on the right was too long, then I over corrected and now its a smidge too short. I'm throwing my hands up and giving myself an A for effort because I cannot sew anymore this week. My back is killing me and I'm seriously considering cleaning out my only guest room and turning it into our "hobby room". I don't think I can sew one more thing at my coffee table.
-Caren
Wednesday, March 14, 2012
Looky Looky
What I'm making....
 Details coming soon on these babies that are going to be hanging in my dining area :)
 Details coming soon on these babies that are going to be hanging in my dining area :)
I've got it covered...
Literally.
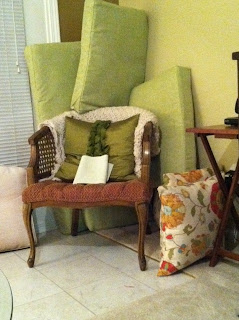
When I first bought my townhouse the first thing my then boyfriend helped me buy was a patio set. It was one of the cheaper ones but that was fine with me because I knew that I would want a bigger set once we moved into a bigger space. Well, 2 years later I didn't listen and take my cushions in when we weren't using them. They have weathered everything from rain, sun, and even hail. Which is why they look like this:
 Well apparently having supper club at our house later this month has gotten my butt in gear with getting things done around the house (the bar, some deep cleaning, getting my portrait framed, some new curtains and now this).
I purchased fabric for 4 pillows and enough to do 2 chairs like the one above and a bench with 2 backs like the chair above. I will be the first to say it does not look like a professional job, however it did beat the price take of $40-50 per cushion for a lady in town to recover them. I spent about $80 on ALL of the fabric. The first chair took me 6 hours to do and turned out like this:

Thank God not all of these chairs have taken 6 hours a piece. I actually knocked out another "back" that will go on the bench last night while watching Rambo with the hubs in about an hour and a half or so and now I've gotten all of this done!
 And only have 1 more back and the bench seat to finish! Look for an updated outside picture of it all at the end of next week!
-Caren
Gallery Wall from A-Z
So to kind of work off of the last post I figured I could tell a little bit about my journey from start to finish of my gallery wall. It's not symmetrical which is outside of my comfort zone but it's growing on me.
It all started about a year and a half ago when I emailed Email A. Clark about using her online design services. After helping me with lamp choices, some artwork, pillows and throws she also mentioned that she thought a gallery wall would look good on the wall that my TV is on. Well putting that many nails in the wall scares the hell out of me but the way I figure it is the walls need to be painted again so if I screw up it just means i have to find someone faster to fix it :)
I started brainstorming in publisher and made this.
 It started out to be more symmetrical but I've been told that I need to step outside of my box in the den and add some funkyness. As you will see even with a design, the way it looks on the wall isn't quite to scale but I think I did an okay job.


And for the final product....
 There will definitely be some changes along the way and maybe some additions. If you have a gallery wall in your home, share your ideas!
-Caren
Thursday, March 1, 2012
DIY State Art
I saw this project on Pinterest and thought it would be a great addition to my bare gallery wall that Lacey and my husband helped me design/hang. There is much to be added but here is what it looked like before we added the state art.
 The artwork on the top left hand corner with the dates was also inspired by Pinterest and was designed by my friend Tracy Woodard! The bottom silhouette of my dear Polly (a 4 lb chihuahua) was done by Deidre, the art director at the company that I work for. The rest of the pictures are just some black and whites on the day of our wedding. I have lots more to fill up so I'm getting nervous about getting it all done before we host our supper club at our house but I digress. On to the project....
First things first was to buy some type of wood to do the project on. I chose something round to give my wall a little contrast since it was full of squares and rectangles. This was found at Lowe's and it's technically I think the top of a table.
Second you'll print out a picture of the state you wish to do. Mine is South Carolina.
 As you can see in this picture I have already hammered nails in around the outline of the state.
Next, remove the paper like so:
 I added a heart around Florence/Darlington where we live like so:
 Once I painted it black and it dried I chose a starting point on one of the outside nails of the state outline. I wove the yarn from a nail in the outline of the state and wound it around one of the heart nails one after another until I worked myself all the way around the outline of the state. One thing I would change is making the heart bigger to make a bigger working area. Especially when using a thick yarn like I did instead of a string.
I did not take pictures during the winding of the yarn because I needed both hands but here is the final product up on the wall! Ta-Da!

-Caren
Tu-Tu Cute!
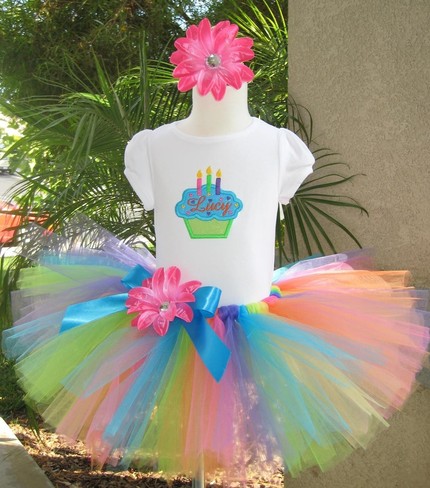
Lacey and I have a friend named Tiffany who has the most precious little soon to be 3 year old. We were all over for dinner and drinks one night when Tiff was talking about little Riley's birthday party and how she really wanted to get this birthday outfit for her off of etsy.
 I knew as soon as I saw it I could make something similar for more than half of that $65 price tag. So I headed on up to the local Hobby Lobby and bought different colored spools of tulle as well as a bundle of fabric in different patterns.
 Tiff agreed that the one at the very top would be a cute number 3 applique on a top for her. That way, it wasn't birthday themed and she could wear the top more than just once.
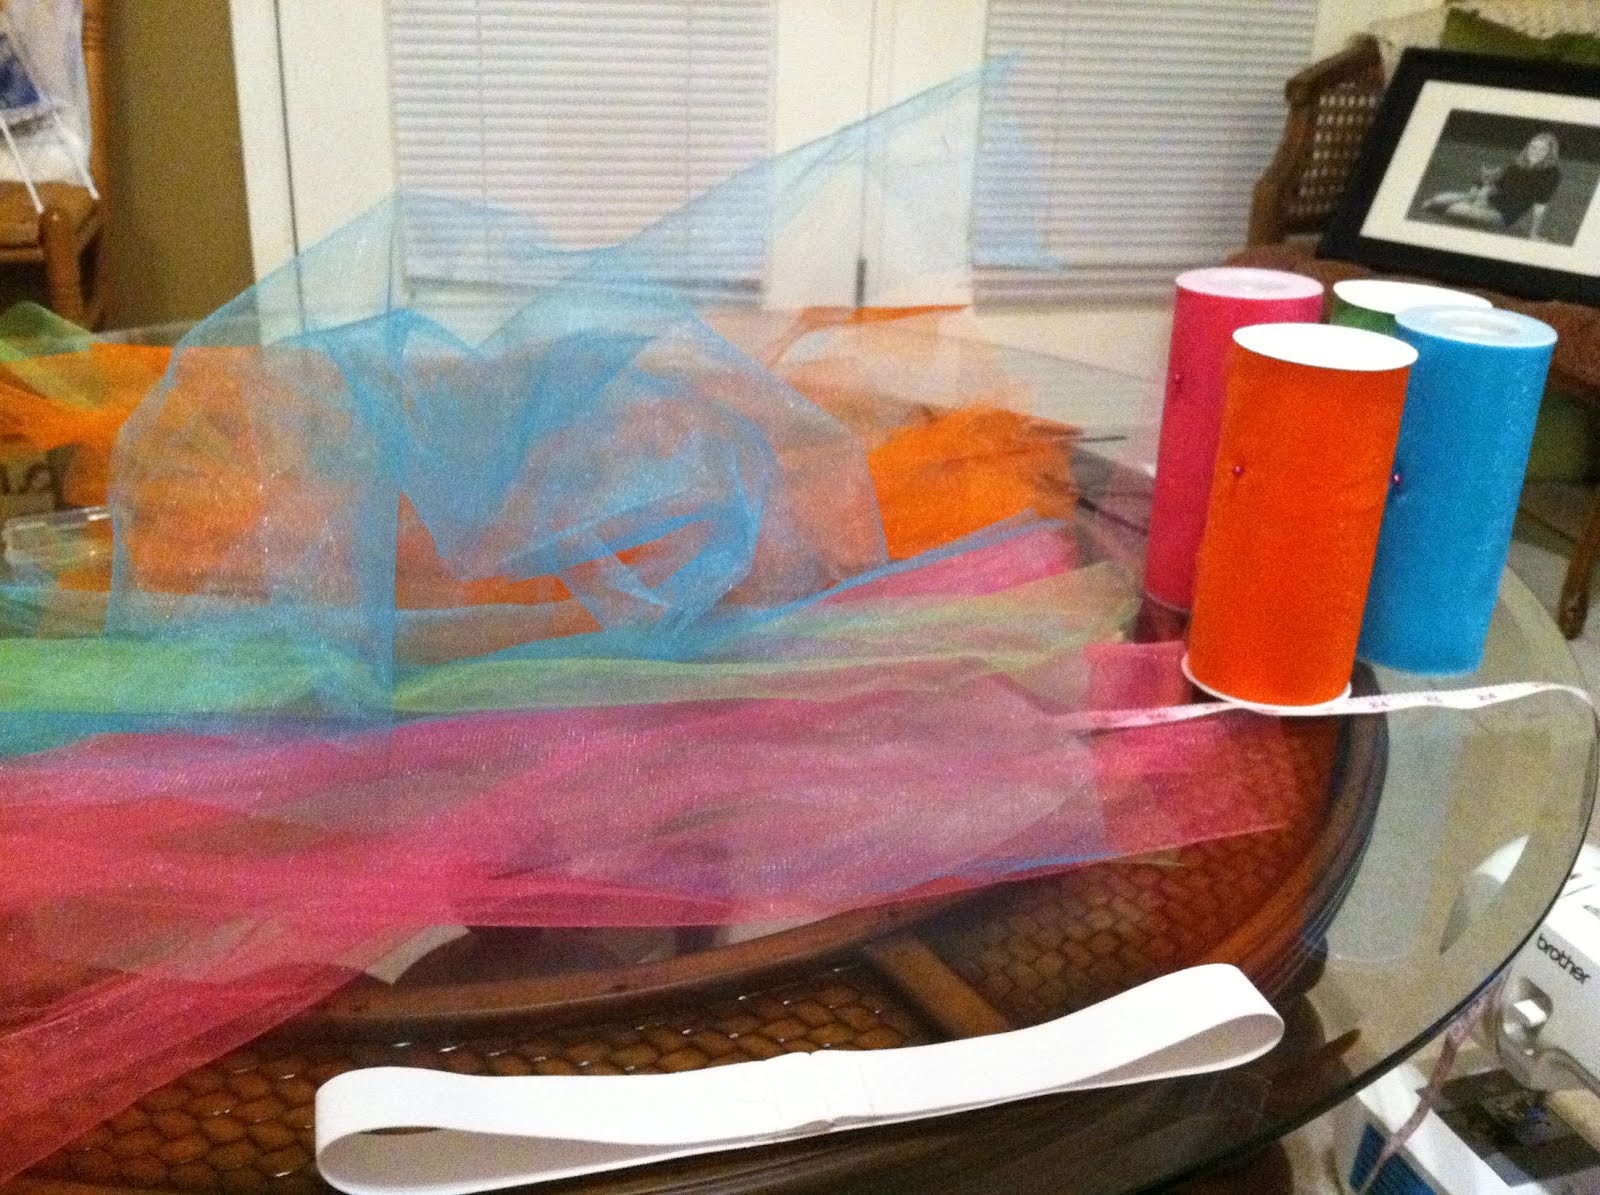
On to the tu-tu. In addition to the above notions I bought a yard of 1 inch white elastic. Based on Riley's waist size I cut and sewed the elastic together. I also started cutting strips of the tulle of each color at 18". It's always better to be generous than not enough.
 One by one I would take a color and tie it to the elastic like so:
 Once I finished about a fourth of it, it looked like this:
 It was really time consuming but a super easy project for all of you mom's to little girls! Here is the finished product.
 Stay tuned on how I put the applique on her shirt as well as her birthday girl pictures!
-Caren
 I knew as soon as I saw it I could make something similar for more than half of that $65 price tag. So I headed on up to the local Hobby Lobby and bought different colored spools of tulle as well as a bundle of fabric in different patterns.
 Tiff agreed that the one at the very top would be a cute number 3 applique on a top for her. That way, it wasn't birthday themed and she could wear the top more than just once.
On to the tu-tu. In addition to the above notions I bought a yard of 1 inch white elastic. Based on Riley's waist size I cut and sewed the elastic together. I also started cutting strips of the tulle of each color at 18". It's always better to be generous than not enough.
 One by one I would take a color and tie it to the elastic like so:
 Once I finished about a fourth of it, it looked like this:
 It was really time consuming but a super easy project for all of you mom's to little girls! Here is the finished product.
 Stay tuned on how I put the applique on her shirt as well as her birthday girl pictures!
-Caren
Monday, February 27, 2012
DIY-er turn Entrepreneur
There is nothing like a wedding that will get your creative juices flowing. I've always been interested in planning events which was part of my last job but this was my niche. Picking colors, looking at every picture a photographer has taken (shout out to Nadean at Gene Ho Photography out of Myrtle Beach, SC!), picking the perfect dress for you and your maids and then watching how everything comes together the day of. I was a very hands-on cost conscious bride. I had a spreadsheet for everything and used people's blogs and such to get ideas of things that I could tackle myself or cut back expenses without cutting back on style.
One thing in particular that I made myself were some of the props for my photo booth. I hired a company about 45 minutes away from where we wed and was not sure if they would have everything I wanted so one of the things I made were mustaches on sticks. They were a hit, let me tell you. Not only were the pictures a hit but the photo booth started a sandstorm of ideas in my head after the wedding. If I was one of the only people in my group of friends that had this photo booth at my wedding, (which by the way makes for great entertainment and favors for your guests :)) there has to be so many people who are missing out on this great idea. I immediately did research to see where different photo booth companies were located in South Carolina along with their pricing. I researched where to buy them, the costs, upkeep, etc. Within a week, I knew this would be something I would love to do. I threw the idea out to a couple of different people but one person stuck out in my mind. My cousin, Elizabeth is very involved in our community and knows a totally separate professional and social group than I do. We got together and formed Flash Photo Booth Rental in September 2011! Since then we have been booming! Weddings have been a big seller for us as well as corporate events, proms and even small children's birthday parties!
Spread the word to your circles of friends and professional groups. It is a great way to lighten up an event and to remember the night.

Check out our Facebook page that has lots of fun pictures from our events here. And our video here!
Tuesday, February 21, 2012
Pin it, Pin it real good...
True to my pinterest addict colors I was looking for an alternative to using one whole cabinet in our itty bitty kitchen to hold all of the glasses, bottles and barware. I came across some great on pinterest like....


One in particular stuck out to me and I thought "that's it!". It was perfect for my little space.
 I searched every thrift store and even pleaded to friends on Facebook to donate and what do you know? The 'ol Facebook pulled through. About 2 weeks after I posted, an old co-worker offered up her old book case that was in her kid's playroom. The thing was in bad shape but was solid wood. I had so many options of what I could do with it! I hate that I didn't take a before picture, but this was the work in progress.


It was an easy, but time consuming project. We sanded, stained (dark red mahogany, bought from Walmart for about 4 dollars), sanded, stained. Once that was done, I took all the shelves out, taped the back of the bookcase off and primed it with a spray primer....Although it was fast, it was messy. I would recommend painting it on. Once I put 2 coats of primer on and they were dried I started painting the back of the book case. The pictures don't really look like the color. It was a mustard color, a good mix between yellow and gold. Unfortunately there's not a BIG contrast between that color and my wall color, like I had hoped. This took probably 4 coats to look even. Then I had to touch it up because when I pulled the painter's tape off it took some of the paint with it. I'm thinking because it was too cold to be painting outside.
 Ta-da! It's definitely not the "bar" I wanted and could have purchased for about $450 but it definitely is serving the purpose. I have a good bit of "tools" to add to the bar but just not sure where I want to make their home on top. For the second shelf I got 2 wine racks from Target for $17.99 (but I used a gift card so I spent $0!). Unfortunately I'm only able to use one because I was short about an inch of space so I have that one stored away for another project. On the same shelf I added a shallow bowl to put cocktail napkins in. On the second shelf I opted against using glass holders because it would have taken up space. And note to those who may want to try this project, I did find that storing the glasses upside down left a weird smell/taste on the glasses from the stain. So right side up they go! On the bottom shelf I used a Pampered Chef trifle bowl to keep all of our mini bottles in and then lined all of the bottles up beside it. The only thing it is lacking is a home for probably the 100 koozies that we have. If anyone has a suggestion, please let me know.
There you have it, my bookshelf bar. If you try this project please post pictures!
-Caren


One in particular stuck out to me and I thought "that's it!". It was perfect for my little space.
 I searched every thrift store and even pleaded to friends on Facebook to donate and what do you know? The 'ol Facebook pulled through. About 2 weeks after I posted, an old co-worker offered up her old book case that was in her kid's playroom. The thing was in bad shape but was solid wood. I had so many options of what I could do with it! I hate that I didn't take a before picture, but this was the work in progress.

It was an easy, but time consuming project. We sanded, stained (dark red mahogany, bought from Walmart for about 4 dollars), sanded, stained. Once that was done, I took all the shelves out, taped the back of the bookcase off and primed it with a spray primer....Although it was fast, it was messy. I would recommend painting it on. Once I put 2 coats of primer on and they were dried I started painting the back of the book case. The pictures don't really look like the color. It was a mustard color, a good mix between yellow and gold. Unfortunately there's not a BIG contrast between that color and my wall color, like I had hoped. This took probably 4 coats to look even. Then I had to touch it up because when I pulled the painter's tape off it took some of the paint with it. I'm thinking because it was too cold to be painting outside.
 Ta-da! It's definitely not the "bar" I wanted and could have purchased for about $450 but it definitely is serving the purpose. I have a good bit of "tools" to add to the bar but just not sure where I want to make their home on top. For the second shelf I got 2 wine racks from Target for $17.99 (but I used a gift card so I spent $0!). Unfortunately I'm only able to use one because I was short about an inch of space so I have that one stored away for another project. On the same shelf I added a shallow bowl to put cocktail napkins in. On the second shelf I opted against using glass holders because it would have taken up space. And note to those who may want to try this project, I did find that storing the glasses upside down left a weird smell/taste on the glasses from the stain. So right side up they go! On the bottom shelf I used a Pampered Chef trifle bowl to keep all of our mini bottles in and then lined all of the bottles up beside it. The only thing it is lacking is a home for probably the 100 koozies that we have. If anyone has a suggestion, please let me know.
There you have it, my bookshelf bar. If you try this project please post pictures!
-Caren
Subscribe to:
Posts (Atom)